Showing posts with label Painting and Modelling. Show all posts

Sunday, 7 May 2017

Beautiful 1/100th Scale Armored Veritech

JBR, here.

I found a series of pics from a Japanese modeler who goes by the Twitter handle @wakasatakeshi

They have put up a series of build pics of a 1/100th scale Armored Veritech on their twitter feed.
Well worth the click.

Here are some sample pics.


Best,
JBR


Saturday, 31 May 2014

Death is the Jungle

Painting and Modelling a Loud Ninja Games Chuhuac Sniper
By Eli


I got around to painting one of my Loud Ninja Games Chuhuac minis. This one is a personal favorite, the sniper from RAP005 Chuhuac Special Ops (HERE). This commando figure is poised with his powerful, long-range accelerator gun used for anti-personal as well as anti-material missions.

Because I wanted to do a more subdued scheme than the catalog Chuhuac, I started with a brown base coat and a bit base. The large base is to accommodate scenic effects. 


I started with a base coat of a sort of pale green, almost like a green-tinted white. This shows up a little bluish in the pictures, but it's a shade of green. I covered all of the parts that should be concealed by the commando's stealth suit. for the base flesh tones, I used an actual human shade of flesh. I left the plumage, weapon, and cloaking pack brown.


The next step was to paint the plumage red and the backpack and gun a dark olive drab.  I highlighted the gun and pack with a bit of the OD and the suit color blended together. I then washed the entire figure in Army Painter Strong Tone wash. I went back and picked out some details with the highlighting color again and smoothed out some of the blotchy parts with some of the base color with just a touch of OD.


Basing was quick and dirty and took all of 5-10 minutes (wasn't counting). I started by simply painting darker brown splotches over the base coat lighter brown. Then, a few dabs of superglue here and then as a run through the grit bin. After this, I glued down the major scenic features (bare branch, leafy shrub, log and rock.

With the arrangement to my liking, I then applied more glue to the ground, this time covering most of it and a few dabs on the bare branch (actually a grape stem). A sprinkle of my special "leaf litter" blend of tea leaves. These are unused tea leaves pulled from their packets and mixed in a container to the right color blend.

After the leaf litter was applied, I went and picked away any bits that were sticking in places they shouldn't and then dabbed a bit of glue on the log and rock. A sprinkle of blended modelling flock gives a nice mossy effect.


The end result is a nice, concealed Chuhuac commando. A deadly threat on its own, giving a raptor an accelerator cannon just seems like overkill!

-Eli

Thursday, 25 February 2010

Sci Fi Pea Dot Camo

.
'Pea Dot' camo schemes I knocked up freehand using Paint.Net during some 'downtime'.

Click on picture for larger image


Midnight Bubblegum

The Midnight Bubblegum is my interpretation of the 25mm Strike Commandos on Tim's Miniature Wargaming Blog. And perfect for the armoured Protolenes!

Martian Desert

Urban Marmalade

One of my favourites but the orange stripes will need to be broad on a 15mm figure and are likely to only suit GZG or similarly robust miniatures.


Urban Brick Ambush

The lighter dots really make the Urban Brick Ambush camo scheme jump out in 15mm! Replace the GW Bleached Bone dots with a darker buff or a light grey if you want to mute the effect.

If you reduce the camo schemes within an image editor, you'll notice that the colours start to merge as you make it smaller. This happens in reality when the naked eye views camo over distance. Good ol' British Army DPM camouflage (green, tan, brown, black), would appear as green/tan/ black at 50 metres, green/black at 100 metres and just plain green at 200 metres.

With the exception of the Midnight Bubblegum camo I've used 4 pattern colours on all the schemes. This is largely unnecessary on 15mm figures, you can see in the Urban Brick Ambush example above, the GW Kommando Khaki and mid grey merge into one.

The four volour scheme will stand out more distinctly where there is a larger surface area such as on PA, Walkers/Mechs and armour.

Cheers
Mark
.

Sunday, 24 January 2010

Harkonnen's Finest

.
This weekend I've managed to paint an 18 figure platoon of 'Harkonnen Sand Troopers'.

These guys are left over GZG SG15-F1 FSE Colonial Legionnaires abandoned and looking for a purpose. And this weekend that purpose became testing a 'quick & dirty' desert cammies painting technique. It wasn't in my plan to paint them fully, but having painted and based them, I now sneakingly quite like the minis and want to put them into action on the tabletop.

I've based the Sand Troopers individually to play Ambush Alley, Tom.War and some 1-2-1 character skirmish games, all loosely based in and around Mudd Eisley. I visualise them very much in the "These are not the droids we are looking for" kind of role.

There's no dedicated leader figure which means one of the grunts in each squad gets a promotion and a big orange stripe. Platoon command is relegated to an Old Crow Outrider Scout Vehicle pulled from another project. Nothing wrong with 'Gorman' style command in the Twenty-ummph Century, but it does make it difficult to love 'em.

I'm bulking out the platoon with FSE Legionnaires in Kepis donated by the Master Chef. I'm not enamoured with these figures but the Kepi heads are easy to snip off and replace. This will add much needed variety and character to the platoon for 1-2-1 character skirmish games. Hope to have these headswops finished and fully painted/based in a day or so.

Finally, I've made a decision to further enhance both the character and firepower of the platoon with Critical Mass Games Merc3 Drone Walkers supporting each squad.

Cheers
Mark
.

Tuesday, 19 January 2010

Top Cat: Sgt Major Moghi - My Way

.
Following the epic battle for Mt Hilinabox, how could I not reward the bravery of Clan Sgt Major G'ngr Moghi - no, not an extra pouch of 'Torsk!' in his ratpack but his own dedicated miniature!

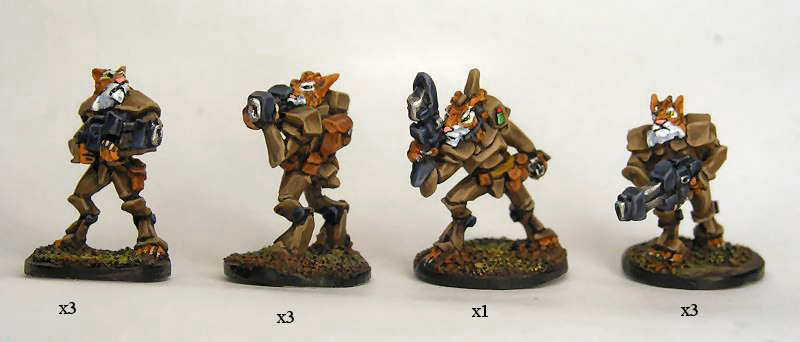
The figure is a Khurasan Miniatures Felid commander from pack TTC-1300. Luuvely models. Not quite finished but I thought you'd appreciate the pic! I really had fun painting this mini and now looking forward to cracking on with the remaining Felids that arrived this week as Russian Blues (grey).

GW Calthan Brown basecoat which is much more chocolate than it appears in the photo. Wash with Devlan Mud. Add Commando Khaki to the brown and highlight with a size '0' brush. You might want to drybrush with Calthan Brown before the highlight. Alternatively, black undercoat, liberally drybrush Calthan then wash & highlight Calthan/Commando Khaki.

The ahem 'Tiger stripes' are applied with a quick slash of an size '0' brush. I decided to go for effect and one or two slashes in each colour worked really well IMO. Judge for yourself in the picture to the right, where the miniature is actual size (approx 100 pixels tall).

Cheers
Mark
.

Saturday, 9 January 2010

These Nazi Zombies Can Go To HELL!

.
....If they didn't already come from Hölle!

Todays post is a work in progress. I'll be updating throughout the day in between painting these %$$###k'ing Nazi Zombies.

I honestly thought this was going to be a fun aside. Tip for Mike or anyone producing Nazi Zombies - they are DEAD! They would have been stripped of kit, no webbing! Please, no webbing! Jim Bowen's superb Gotterdammerung range got it RIGHT!

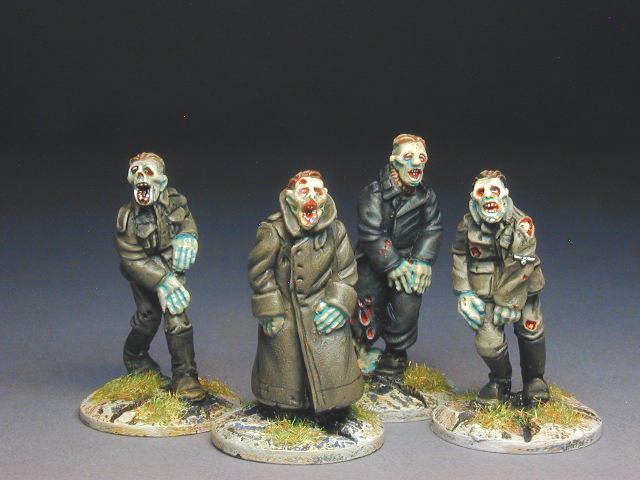
OK, as these were Zombies I started with spraying them with a Humbrol enamel Field Grey from a can that was mmm##pphh years old. Worked a treat. I used this several years ago to great effect on my German 'Stalingrad' collection after noticing in photos of German troops at Stalingrad that they were covered in tons of dust - this seemed a practical instant method of highlighting & weathering the miniatures at the same time!

I thought to myself Nazi Zombies - lot's of grey masonry and earth dust on them - do the same.

This time I added an extra step - basecoated Field Grey, washed with a watered down Citadel Badaab Black. With the first batch, I slapped over the whole miniature - MISTAKE! Rather than defining the creases, seams, folds etc - it just made the entire uniform dark green - %$$###! Had to go back and drybrush the lot Field Grey again.

Lesson learnt, I used a smaller brush to add the Baadab Black where necessary on the remaining 30 odd figures, then drybrushed the lot with Citadel Fortress Grey.

Where I am now doing my head in, is having to paint all their boots and webbing black. But I've come up with a quick and easy technique......thin the black so that it's semi opaque and brush it liberally over the boots and webbing straps/ammo pouches - what you'll find is that the Field Grey comes through on the highlights making the black leather look worn.

The straps of the webbing have three surfaces - top and two sides, with a small brush you would probably have to paint these with separate strokes, but with a semi-opaque 'wash' - thicker than a Citadel wash, and a size '6' brush, the black runs into the sides and colours but the top and edges but again, gives it an instant highlight/worn look - which will be further enhanced by the final drybrushing.

Whilst at it, I thinned the black paint a little more and then ran it into the deepest creases, over the facial features to create depth and along seams, before drybrushing the figures with Fortress Grey, including hands, faces and hair. If you think you've overdone it on the webbing a quick Badaab Black or Gryphone Sepia will rectify.

UPDATE:

Features. I now used Vallejo Camouflage Green to drybrush with a 'o' size brush over the hands and faces, then added Vallejo Elf Flesh to the green and lightly this time drybrushed again.

At this point - the figures look pants! I am completely and utterly disheartened! Time for a Vodka!

UPDATE:

Refreshed, I dappled Elf Flesh on the ends of the severed limbs followed by GW Scab Red, then slightly thinned the Scab Red to stain the mouths/faces, fingers and some areas of the uniforms and boots.

All is forgiven. The 'blood' effects have brought the minis to life (so to speak!). They look GREAT (for Zombies) and I'm bloody, ;-) delighted.


THOUGHTS:

I could have made this easier on myself and had fewer steps - I know for the next batch. In fact I'm tempted to go full 'Hollywood Field Grey' - use GW Adeptus Battlegrey as base and use GW Gryphone Sepia, Graveyard Earth to shade/highlight.

The bareheaded minis are great, can't fault them at all. The heads with German helmets are I'm sorry to say, sad representations of the Wehrmacht M35 and looks far closer to the Spanish M26. Some better than others. Luckily I have several old Battlefront Germans whose heads will be given up in a greater cause for the next batch. The peak caps of the officers - mmmmmm - I left these minis out of this round of painting and again, will use spare German heads with helmets and field caps instead.

I'm encouraged enough to convert a sample of a Modern Zombie young lady running with telephone handset and severed cable that Mike sent me. I'm going to give her a sidecap and change the outfit with Green Stuff to turn her into arespectable imitation of a 'Luftwaffenhelferin', and go through my Peter Pig and Battlefront minis to see who else can be converted in a Zombie Nazi!

Cheers
Mark
.

Thursday, 7 January 2010

GZG FREE 15mm Battle Force Offer!

.
I'm finishing off my Abominable Snowmen from Green Eyed Minis tonight - snowy bases an 'ahin! Well with the country looking like the Lion The Witch and the Wardrobe.....

So whilst I'm drying brushing I'm thinking to myself, that man Tuffley needs more ready made Battle Forces to take into account his newer AFV ranges.....

I get as far as "Hi Jon..." when, a chatty email pops into my inbox with this attached........


From Jon at GZG:

"A request for some help in return for

FREE MINIS!

I want to put to you all an idea that came about from a conversation I had this morning with my Web admin chap - we were discussing the fact that while we are now trying to ensure we get photos for the webstore of all the individual new codes we release, we have none showing the special pack deals that we offer.

We'd like to have some good quality pics that really show off the pack deals to best advantage, and there is simply no way I will ever get round to having the time to do this myself - so we're asking if some of you would like to do it.

Most of you are probably familiar with the BATTLEFORCE deals we offer on the 15mm Stargrunt range figures and vehicles - you get a good core force to start your army; the exact composition depends on the pack you choose, but in general you get a combined arms group consisting of a section or platoon of armour, a platoon of mechanised infantry plus (where applicable) a mix of support, recon, command elements etc., with various accessories and extras thrown in as well - over £75.00 worth of minis for a deal price of £60.00.

Now, we want to give some of these BF deal packs away FREE (we'll even send it to you post free)!

The catch is, in return for one of these FREE packs we want you to commit to ASSEMBLING AND PAINTING the minis in a reasonably short timeframe, and sending us some decent photos of them which we can use to illustrate the pack contents on our webstore, in adverts and so on.

Obviously, you get to keep all the minis - all we want are the pictures. You'll be putting in a good few hours of your hobby time, but in return you'll have a finished army that you can use at no financial outlay - so everybody wins! ;-)

We WOULD ask to see a pic or two of previous stuff that you've painted (it doesn't have to be anything of ours, just something to show your style) when you apply, but please don't be put off if you don't think your work is of the highest standard. We are not asking for prizewinning painting levels, though obviously we do want the results to look competent and attractive. Even simple paint jobs (sprayed basecoat and some washing/drybrushing) can look fine, and in many ways these actually show the lines of the minis better than things like complex camo patterns. What we need is a few of you who are prepared to commit the time and effort to actually getting the job done, so please don't respond if you don't have both the enthusiasm and the free time available in the near future.

Just as a final incentive, while I've said that we don't need an incredibly high standard, we WILL give something extra as a PRIZE for the most attractive finished force after we get them all in!

Quantity-wise, we're talking about in the region of ten to a dozen vehicles and forty to fifty infantry figures (which may be single or fireteam-based to your choice) in each BF deal, exact numbers depending on which pack it is.

So, IF you can fulfill all of the following.......

1) you can commit to building, painting and photographing a force of that size in a reasonably fast timeframe (we're looking at ideally around 4 to 6 weeks from you receiving the parcel from us).

2) you have a reasonable standard of painting and modelling skill - sufficient to make the minis look attractive at tabletop viewing distance, we don't need exhibition standard but we don't want splodgy messes either!

3) you have (or have access to) the facilities and equipment to take a number of qood quality, well lit, in-focus shots of the finished minis, in groups and singly, and send the results to us by email.

4) you'd like about £75 worth of completely FREE minis in return for some time and effort....

...then please drop me a line directly, to jonATgzgDOTcom. Please attach at least one pic of an example of your painting, and please let me know which one(s) of the following forces you would be most interested in doing:

TRACKED force
HOVER (GEV) force
WALKER force
EARLY GRAV force
HI-TECH GRAV force
HI-MOBILITY WHEELED force
KRA'VAK grav vehicle force
8-WHEELER force*
AIRMOBILE (VTOL) force*
ADVANCED GRAV force*

(* these are ones where we haven't yet sorted out BF deals on them, but I want to gauge interest in doing them....).

We will need to get ONE of each force type done, so if you want to give us several options in order of preference then that would make things easier rather than everybody wanting to do one type!

Please note that the INFANTRY nationality supplied with each force will be to OUR choice, because we want to depict a good spread of options, but if you have any particular likes/dislike feel free to mention them and we'll try to take that into account.

IMPORTANT: by replying to this request, you are merely expressing interest - you are NOT actually committing yourself (or us) to anything at this stage - we won't send anything out to anybody until we've confirmed and agreed everything by email. However, by responding you do affirm that you are able to fulfill the criteria mentioned above. Obviously we do reserve the right to make all decisions about which offers we accept and reject.

Jon (GZG)

Get cracking guys!

Cheers
Mark
.

Wednesday, 6 January 2010

Painting Those Damn Crusties

.
Like many of you I'd been scratching my head on how to paint GZGs 'Crusties'. Oh I know what colour schemes I want to paint them - think Lobster Thermidor! - but it's how to get that effect without spending hours of effort detailing each figure.

Playing with my 'feral' Hammerhead Space Demons last night, it came to me..... take a look at my post of 25th April (here). Perfect!

Step 1: Citadel Bleached Bone basecoat

Step 2: Citadel OOP Flesh Wash over all of the model.

Step 3: Very very light Citadel Devlan Mudd wash in joints only

Step 4: Much watered down Asurmen Blue, again in joints. Better to repeat than to swamp your Crustie in blue. Add the blue to other areas to taste.

Step5: Highlight edges of exoskeleton with Bleached Bone. A very very light drybrush works best as you want that 'mottled' look.

Step6: OPTIONAL - A quick zip along the tips of all major edges with the edge of the smallest brush you've got.

Step7: OPTIONAL - Again using your smallest brush add 'camo' spots of Devlan Mud and or Flesh Wash (to taste) to the major limbs. Alternatively, for a lighter effect, watered down Bleach Bone spots.

UPDATE:

Ther figure isn't quite finished yet but following a bit of trial and error I've settled on this simpler and far quicker scheme:

1) Vallejo Elfric Flesh Base
2) Citadel Baal Red Wash
3) Citadel Devlan Mud Wash
4) Citadel Asurmen Blue Wash

You only want a thin coat of each wash. The Baal Red will turn very pink, don't worry, the Devlan Mud will give it more depth. Put the Devlan Mud on before the Baal Red dries fully, that way it will 'lift' some of the red leaving the Efric Flesh with just a pinkish tinge.

The Asurmen Blue provides the Crustie with a more mottled and translucent appearance - just like prawns! Don't let the lue wash pool too heavily in folds and creases - use a dry brush to remove any excess.

More Photos Later...... coughing fits and tight chest returned, so can't finish the fine detail tonight. Actual colour of the model is better than you see here, IMO. The camera flash has bleached the 'pink' and lost much of the colour gradation.

Cheers
Mark
.

Monday, 21 September 2009

Critical Mass Games - Wave 2 Released

.

Just a quick reminder that Wave 2 of Critical Mass Games new 15mm releases are available on the website NOW!

Wave 2 includes Arc Fleet Rifle Infantry and the full range of Combat Walkers previewed on Dropship Horizon last week whihc showed pre-production photos illustrating the breakdown of parts.

The Combat Walkers are available singly and in discounted platoon sets. Something worthwhile to take on those Rebel Minis' Martian Walkers and 15mm.co.uk Giant Mechas on their own terms!


Whilst designed to support the Arc Fleet forces, these beauties will fit in with many Near Future and Sci Fi ranges currently on the market.

Remember that the Combat Walkers come with a randomly supplied crew figure. See the variants below:

I had a rewarding chat with Craig on Saturday regarding painting and basing techniques. You can clearly see Craig's fine work in this picture of the Arc Fleet Rifle Infantry:


If you want to achieve these sort of painting results yourself pop over to the Critical Mass Games' Forum and follow Dales' step by step tutorial on painting the Light Recon in a 'Desert' scheme (Dales Desert Painting Guide).

It's worth keeping an eye on the Painting & Modelling thread to see how other gamers have painted their minis. I particularly like the overall effect of the painted miniatures by Alexmunkey and Tri3. Something about Phil of Firezone Studio's more classic Sci Fi hits an inner cord with me and subsequently inspired me to paint some of my Light Recon miniatures in a similar fashion as a 'Commando Strike Force'.

Combat Walkers and Arc Fleet Rifle Infantry are available from:

Sunday, 6 September 2009

Graffiti Camo Inspiration

.
Driving to a work site in a depressed area of the Granite City, I noticed a graffitied roadside telephone exchange box. The box itself was 'battleship grey' and had been given wavy camouflage lines of red-brown and black. It stood out for complimenting it's granite and brick surroundings, and looked cool.

I'd been looking for a slightly 'different' camo scheme for my Khurasan Corporate Marines, so kept the image in my mind. Once home that evening I used Paint.Net, not trying to win any art prizes here, to painlessly try out the grey/red-brown/black camo look on Jon's Corporate Marines without even having to lift a brush - wait for undercoat to dry, you know.....

Even as I went along the line of figures in the photo, I thought yeah, that's not too shabby at all. All well and good, but how does it look in 15mm? My favourite graphic utility for photograph and digital images is IRFANVIEW. Free and completely painless to use for 99% of your everyday digital photography tasks.

I opened up the photo above in IRFANVIEW, held a Corporate Marine miniature to the screen and reduced the size of the photo until the two matched.

Click on the picture to get an idea of the difference.

I use this technique with camo schemes all the time, whether graphic swatches or photos of actual uniforms and soldiers all the time. It gives you an idea of what is likely to work and what will be simply too fussy when it comes to reproducing your chosen camo scheme in 15mm.

Once again, It doesn't replace trying things out on a 'test' mini, but it does help you decide on the colours and best approach before you apply the brush.

Subsequently, the Corporate Marines have slipped into my painting schedule unannounced and are now sitting undercoated Adeptus Battlegrey on my desk. I'll keep you updated on progress in the coming week.

Cheers
Mark
.

Quick Tip...... Paint Palettes

.
I've only recently started using Vallejo paints, and thanks to Maelstrom Games' 15% off promotions in July I managed to get a nice collection of drab colours suitable for camo schemes.

Vallejo has several different ranges of paints with subtle differences in shade. To help me choose the paints I wanted from across these collections I saved the paint 'swatches' as jpegs in a folder on my desktop. To make ordering and future identification easy, I gave each of the colour's jpegs were a simple name which described the specific Vallejo range such as Model, Game, Panzer Aces etc and then the colour title.

Once saved, the thumbnails are easy enough to move round in the folder to create a complimentary colour palette. You can use Windows' PrintScreen facility to take a snap of this palette and save as a jpeg in it's own right.

When it comes to choosing colours for camouflage paint schemes, I can now simply compare the camo against the Vallejo palette to see which colours are most likely to work.

Again, a quick PrintScreen will capture the palette and camo scheme side by side and can be saved as a jpeg on your desktop for quick reference throughout the project.
You can also use a simple free graphics utility such as Paint.Net with which you can copy the colours from the palette and drop them into the camo scheme (when you have a clearly defined picture as above it helps) to test out different effects.

Now, this doesn't replace trying out the actual colour paints, and I don't pretend it does, but it does quickly give you the ability to try different camo patterns, effects and determine if you need to buy any new paints before starting the project.

Cheers
Mark
.