Showing posts with label Review. Show all posts

Saturday, 14 March 2015

Model Brush Reviews 15mm Ion Age Terrain

From the Ion Age Blog


Model Brush is a wargaming review website run by a small group of talented guys in Spain. Late in 2014 they approached us to review our Ion Age Terrain Range on their website. Specifically we sent them the introductory starter set IAF044BU01 Habitation Outpost Bundle which has a 20% saving giving a great overview of our terrain range.


You can access the product review HERE.


The review looks in depth and impartially at the pieces in the Habitation Outpost Bundle and features many images and opinions. They look at the Hab Domes, the Connector Corridors, the Turret Modules, the Pressure Door, Crossroads Connector and the Power Spire. I like their review style and I will leave you with the final line from the review:


“We can only say good things about these little outpost: the quality is great and the size is bigger than we expected. The only bad thing about it is… that we want the bigger outpost packs!!! (Meanwhile, we have started painting this outpost, so stay tuned for it!)”

Tuesday, 21 October 2014

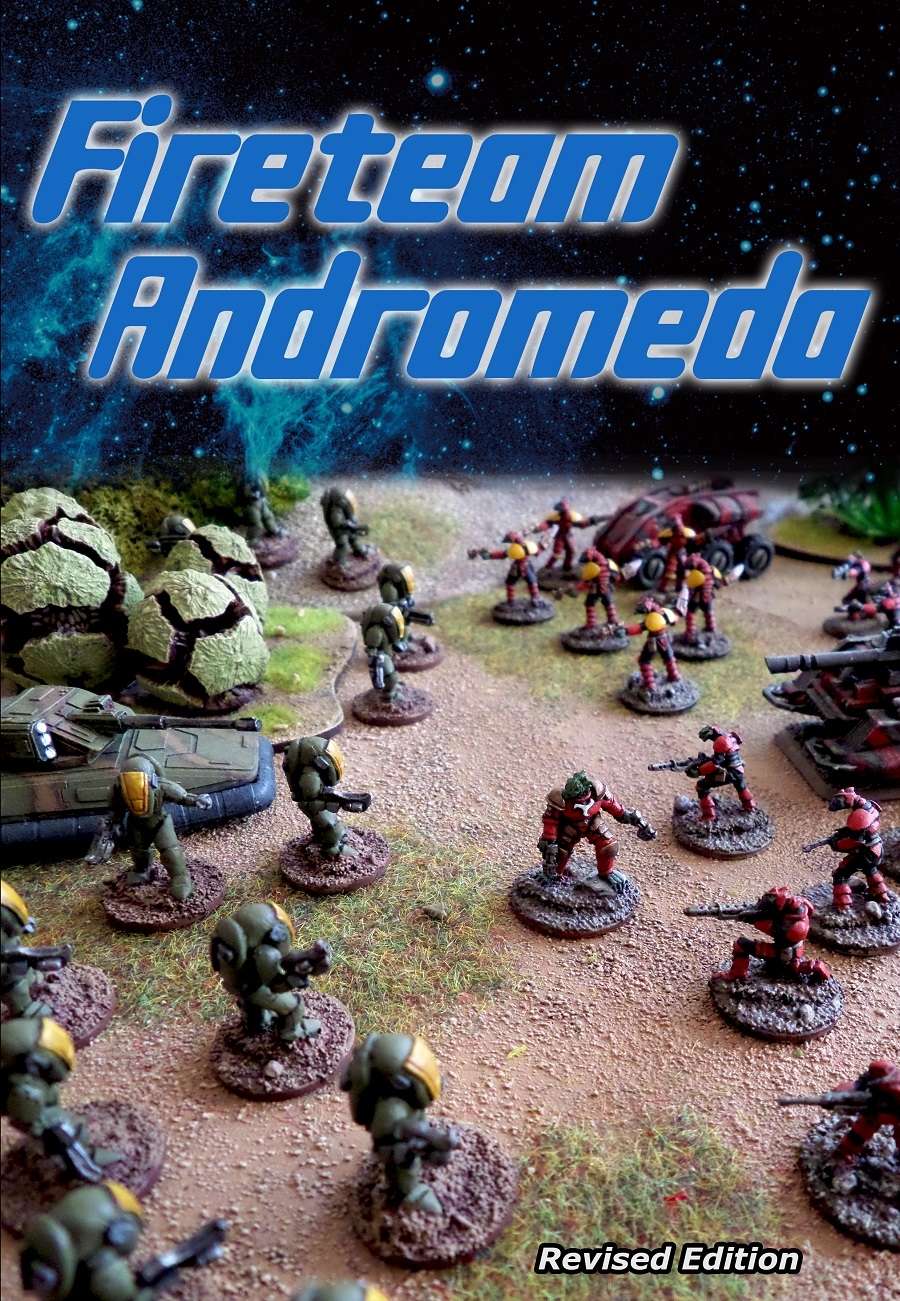
Fireteam Andromeda Revised Edition- First Impressions by Podsy McPod

Fireteam Andromeda Revised Edition- First Impressions
By Podsy McPod


Available at : Wargame Vault

This article concerns itself only with the changes to Fireteam Andromeda, please see link for a review of the original game.

First off I have to declare an interest as I was one of the play testers for this edition.  I was pretty happy with the play test version I had and when revised edition arrived I was shocked to see it differed hugely from what had gone before.  So what has changed?

The most important change by far is that the unique and extremely tactical command and control system has been given an overhaul.  The system for counting the number of commands you can give in a turn has been simplified. Shaken units now cost two commands to activate at all times.  With this simplified system there is no longer a need to share commands and this mechanic has been removed from the game entirely.  Even more important than this is that a hard cap of three commands per unit has been introduced.  As shaken units now cost two commands to activate there is an immediate reduction in their options for additional active or reactive commands.  You find yourself thinking very carefully about the implications of how you spend your commands.  For example if a shaken unit decides to concentrate fire for a bonus to hit it has spent all three possible commands already leaving it unable to issue any reactive commands like defensive fire against an assault.  This system may sound a bit confusing but I promise you it is a model of simplicity in play and highly intuitive.

The next major change is to vehicles.  The weapons that come as integral to the various vehicle types have been toned down so you will find yourself spending points to up gun them.  All vehicles now have two hit points with the exception of the heaviest armoured units like tanks which have three.  When firing a unit at a vehicle you only count your best result not all your hits.  So small arms if increased in power, firing at rear armour,  or being really lucky can damage light vehicles for one point of damage  but a volley of eight shots can no longer cause eight points of damage, only one.  Powerful weapons can still explode vehicles in a single hit.  The best result rule vastly increases the survivability of vehicles especially light ones.  Combined with a radical decrease in the points cost of light vehicles I am finding many more transports, infantry fighting vehicles and battlesuits appearing on table.  Infantry survivability has also increased with a standard saving roll going from 4+ to 3+.  These two changes combine to make it a much more viable option to use vehicles to transport infantry.

Melee combat has been revised.  It is no longer an "all or nothing" attack that wiped out the loser.  The loser must run away but lives to fight another turn.  The winner can choose to pursue the losing unit or take a free move.  There were a couple of unfortunate combinations of traits and upgrades in the old rules which allowed assault super units.  Thankfully these have been removed or restricted.  A successful assault against an unshaken enemy is very hard to pull off just as you imagine it should be.  So assault remains a useful tool but no longer threatens to overwhelm shooting.

Anti armour weapons in the old rules could only fire at vehicles and quickly became the least favoured weapon choices.  They are now free to fire at any target which means they can be really useful against heavily armoured infantry like power armour troops.  There also seem to be a lot more light vehicles around for targets.  Unfortunately the pendulum seems to have swung too far.  Automatic weapons (low power, high rate of fire) seem pretty feeble compared to their versatile or anti armour counterparts.  The moderately higher rate of fire not counting for much when it so hard to get a kill even on infantry with standard armour.
A couple of traits in the old rules especially commander traits were distinctly over powered and these have been removed or radically toned down.

Walker vehicles (mechs) were a poor choice of movement type in the old rules costing the same points as ground units but only giving one third of the movement of standard ground vehicles.  Now it is half which combined with their unique ability as vehicles to initiate an assault, ability to move unhindered through terrain and to fire all weapons even after a full move, brings them right back in to play.

Finally there has been a thorough revision of weapon stats and points costs in general.  There was not a lot wrong with the old point’s costs but I think the changes that have been made are in the main very successful.  I keep discovering little subtle changes which improve things so by no means take the above as an exhaustive list of changes.

So what is not to like?  Standard infantry weapons have been changed from a choice of six, each with their own unique stats and three possible upgrades. The six names remain but all three infantry rifles have identical stats as do all three assault carbines. The three possible upgrades are still available but I would be surprised if you do not choose the improved power upgrade option most of the time.  I have heard the change was done as most people chose the weapon with the most power.  So in short for playability.  I can see the author’s point that all infantry rifles serve the same purpose but the result does feel a little bland.  Buying improved armour for infantry has been made more expensive as the base armour value of infantry already starts one point higher and the higher numerical value it reaches it gets disproportionately better.  This now means light infantry are viable but I feel it is unlikely players will buy improved armour as an extra hit point or another figure can be bought for a similar cost.
Personally I feel infantry survivability is a little too good now but there are only six sides on a D6 so the graduation of change is limited.  Standard infantry with unimproved weapons and lacking support weapons will not cut it in a fire fight against infantry who do have these attributes even if the opposing units are similar points values.  The author has said that in his view of sci-fi combat infantry without support weapons would be "out of the ordinary".  This imbalance may come as a shock to new players.  I will have to get used to fielding smaller units with support weapons.

There are a number of colourful traits for infantry like artificial (robot) which are nice to provide interest for scenarios or free form games but they are really not viable in competitive play.  You will find yourself struggling not to choose the trait that allows access to additional support weapons for every infantry unit.  If you don't take support weapons for an infantry squad there are definitely plenty of good choices of alternatives to put the points into.  The points system is certainly robust enough for pick up games to an agreed point’s value, with the one proviso for infantry mentioned above, so I would imagine most games will be organised this way.  So you may struggle to differentiate your infantry with a limited range of viable weapons, armour, and traits.
So do the positives outweigh the negatives?  Yes, without a doubt, by the weight of a galaxy or two I would imagine. The core of this game is the unique and highly tactical command and control system.  Not only has it been streamlined it has been improved.  A highly impressive feat!  All vehicles even the lightest are now viable choices.  I thought vehicle combat was good in play test it is now even better.  In my original review of the rules I said they could do with just a little more polish.  I can assure you they are now gleaming.

Sunday, 27 April 2014

Mr. Harold's Magical Miniature Review - 15mm.co.uk Modern Tents

By Harold

Hi everyone, today I review modern tents by 15mm.co.uk.  A really cool set of terrain usable for all types of genres.

Available at:

http://www.15mm.co.uk/products/fms02-torn-modern-tents
http://www.15mm.co.uk/products/fms01-modern-tents


Thursday, 27 March 2014

Mid-Week Debrief - 5150: Star Army Review by Geek Ken of keekken.blogspot.com

Posted by Harold
Written by Geek Ken

This work is licensed under a Creative Commons Attribution-NonCommercial-ShareAlike 3.0 Unported License. All works must be attributed to the author. (Geek Ken, geekken.blogspot.com)

Review: 5150 - Star Army


Two hour wargames has a slew of settings using their Chain Reaction rules (which are available free). Their sci-fi ruleset is 5150: Star Army which is designed for a variety of scales but works for best for 15-28 mm. Now Chain Reaction has been out a while now and this is not the first iteration of their sci-fi rules. Their latest version, which came out in 2011, shows that as it seems much more polished and refined as a dedicated ruleset of military style engagements.

Wednesday, 19 February 2014

Mid-Week Debiref

Armies Army BTR 290 Out of the Bag 

By Eli
BTR 290 advances with RUSK forces. Image from Armies Army
I've had a hold of the BTR 290 for some time, but I have to admit, I wasn't sure if it was just a sneak peak copy from a friend in the industry or if I was allowed to go ahead and review the thing. Well, a bit of a nudge from Keith over at Armies Army told me otherwise and so here I am.

With the vehicle ending its pre-order phase and about ready to come out, now seems as good a time as any.


For those of your who are not yet familiar with the vehicle, the BTR 290 represents an interpretation of a future development of the current day BTR series of wheeled vehicles used by the Russians. The lines, details, and weapons have been updated to reflect that future battlefield presence but the overall feel of the vehicle is still familiar and instantly announces its intentions as a future Russian style vehicle.

Parts
The kit itself comes in ten (10) parts. A single piece, resin-cast hull, single piece resin turret with attached gun and eight (8) identical road wheels. I have displayed half of the wheels flipped over so you can see the nice, deep, clean sockets they have for fitting onto the robust posts molded into the BTR's chassis.

Materials and Casting
The resin is a good quality. It has more of a plastic finish than some of the more ceramic feel sorts I've run into. the finish on the model is crisp in the details with a sort of an intentionally rough finish, as if the vehicle had some sort of special coating. This finish does not seem to mar any of the details which remain crisp. The pre-production version I received has a substantial piece of resin under the barrel that is not part of the gun and seems like a molding channel to make sure the resin ran the length of the barrel.


The wheels of the model are all metal, cast in a good quality pewter with sharp details including hi-tech hubs on the wheels and a deep chunky tread on the tires. As mentioned earlier, the back side of each wheel features a deep socket designed to fit snugly over posts sculpted onto the suspension. The posts and their associated holes are so robust, I feel these will offer plenty of anchorage for glue and make these wheels stay on after plenty of games.

Conclusion
Overall, I feel this is an excellent model, especially considering it was the first one designed by Keith for Armies Army. The style is obvious in its intent and there is no confusing where this vehicle belongs. It's a great supplement for any future force of Russians, regardless of which line of miniatures your infantry come from.


Thursday, 13 February 2014

Review Madness coming to Dropship Horizon on Wednesdays with the "Mid-Week Debrief!"

By Harold

Hi Everyone, since Dropship Horizon is an ever-evolving monster of 15mm goodness we're going to try something new.  Wednesdays will now be known as the "Mid-Week Debrief" (mark your calenders) where we will gather our reviews of products and post them on those days.

For the Mid-Week Debrief we won't be posting anything except reviews, unless there is no review that day, and then it's business as usual.

If you have a review you'd like to share we'd love to post it up! Please contact us at: dropshipcomms@gmail.com

Thank, and we'd love to hear your feedback on this.  We're hoping that this will help reviews get more exposure and keep them from getting buried under unrelated posts.

Video Reviews by Harold: Gamecraft Miniatures 15mm Scale Marshborn Tomorrow's War Building

By Harold

Note: As this is my first video review, I'd love to hear any comments you guys have, thanks!


The building is available from Gamecraft Miniatures here.


Tuesday, 11 February 2014

PMC 2640 Review - PMC 2640 gets played against a real human opponent! by Gavin McClements

Posted by Harold
Written by Gavin McClements


PMC 2640 is available from Assault Publishing as a PDF, book or bundle.  

PMC 2640 gets played against a real human opponent!


I was pretty excited about PMC when I finally got my hands on it a few months back. I wrote my introductory battle report on it after doing a solo run simply because I had to...but I finally got my first "real" game in last night.


I decided to forgo my usual note taking and just enjoy the flow of the game for once. What Im going to present here is a series of pics with ultra-quick commentary, and then give a few more thoughts on the game itself.

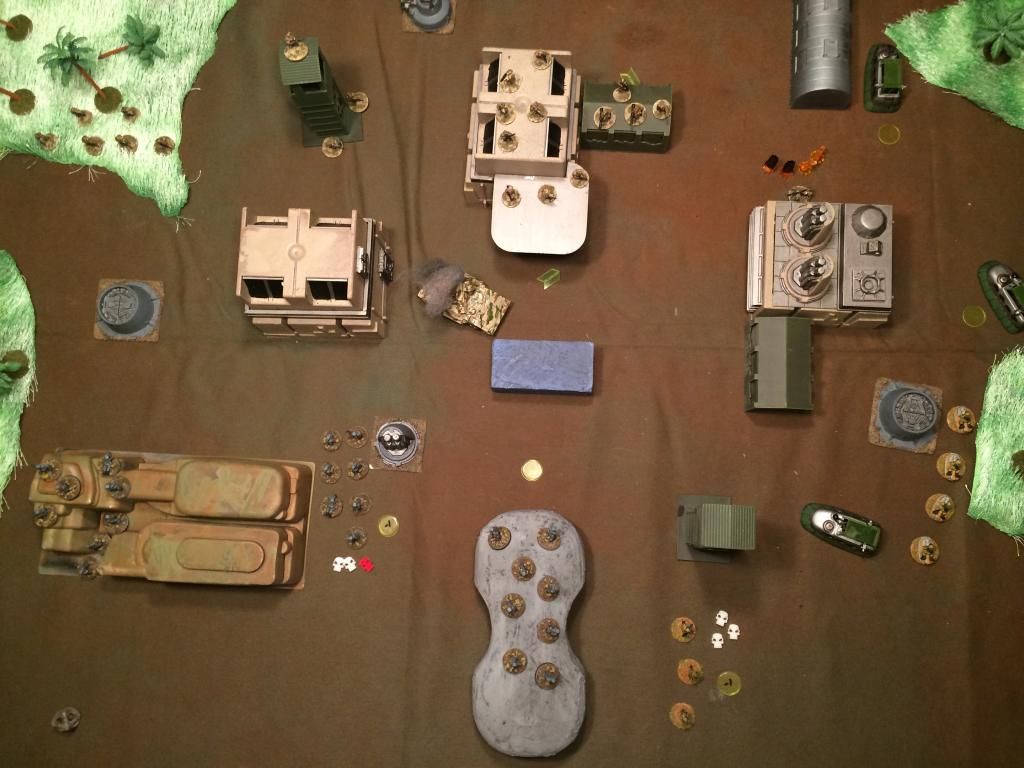
Here is our battlefield as it shapes up and forces are chosen.

I had to introduce the mechanics of the game in and amongst the descriptions of the unit stats and what they meant - fortunately my opponent was a veteran and picked it up quicker than I would have liked him to!

We played an easy Tier 3, Priority 1 battle. Left to right:
4-man Tier 3 Rocket team
3-man Tier 2 LMG section
6-man Tier 3 LMG team (one member is being interrogated by the enemy, but managed to escape in time for the battle)
4-man Tier 4 sniper team
Tier 3 Light combat vehicle
8-man Tier 3 Rifle team

Honestly, as I was deploying, I thought the red thing in front of me was a hill...heh oops! :)

We played a Capture scenario, where we had 20 turns to contest 3 objectives: the 2 watch towers and the low, flat grey block in the center (it was VITAL, I swear it!).

Deployment as it is shaping up:

My opponent was fielding a version of the Slammers, with 3x Tier III Grav Combat cars, some mortars, scouts on grav sleds, and quite a few Tier I rifle teams.


His models were pretty cool. Here are his Combat Cars and Scouts.


The game starts, and he starts flanking to my left with his vehicles. I snake my way towards the center with my Light Combat Vehicle. His grav sleds rush up and pull their first Markerlight designation, which immediately brought mortar fire down from the other side of the map. Fortunately it missed.


The rules for buildings were really easy, but we had packed them in so densely that the only things really maneuvering where the vehicles (his to hunt, mine to evade).


You can see his tanks sneaking around to my left. I felt I was secure in the buildings - my snipers had Gauss weapons which gain a +1 vs vehicles, and I had a lot of faith in my bazooka team, but the snipers never got to cover before they were pounced on...and this was their quick and inevitable end:


(Hint: 1 guy, with a modified Morale of 1, with 12 Suppression markers....he wasn't long for the battlefield! [He fled the next turn])


My bazooka team didn't fare much better, either, taking lead from fire hoses at near-point blank range, which ended up being too close for them to arm their own rockets. To make matters worse, you can see the smoke billowing from the center - my light tank took its final demise from small arms! That's right - at point blank range from an angry mob, even assault rifles can finish off light armor, which was scary to contemplate!
On my right, the LMG team wasnt doing much better. They slogged through cover for two turns, and when they popped out, took some crazy-accurate fire from some rookie gunners across the way, and spent a few more turns cowering under cover.

They finally had had enough of being pinned down on the right flank, and decided to make a mad dash in a vain effort to redeploy and aid their ailing left flank.

It was a futile gesture. The Combat Cars kept coming, while mortar fire continued to rain into the Bazooka team. The tank at the bottom of the pic here wiped out a few more of the redeploying LMG team and sent them right back into the woods.

It was getting late, and with the all-but-complete destruction of my bazooka team and my LMG team pinned again, I called it. We made it 5 turns, and it was a complete route. I killed a few scrubs with my central Rifle team, but really didn't return effective fire on any front. Here is the outcome:

Finally, satellite imagery confirmed the conflict's result:


So, I had a blast even though the game was over almost before it began. I knew Aron would be bringing vehicles, but I put my points into small, more veteran units. I think he did it right, as the firepower from his tanks was almost always a 9, and only rarely a 7 - brutal in such short environs. He proved that Tier I troops might not be glamorous, but their effectiveness was plain to see. The few I hit did break nicely, but he rallied against long odds and kept them on the table.

Actually, come to think about it, his dice were hot when they usually aren't, so it was good to see luck back on his side. There was nothing atypical in this game - it had its ups and downs, but no single roll or action seemed out of place.

The game is, indeed, a fast-play ruleset. I'll borrow some of my opponent's words as he described it our local group, since he was seeing it with fresh eyes:

"It plays well, quick play set a bit like slammers but not as crunchy. Simple force building, with this "tiered" structure you may have read about. So no custom options but with a bit of imagination I was able to do slammers combat car platoon supporting some local irregulars.

I'd rate this 8/10
Slammers & StarGrunt 9/10
Tomorrow's War 7.5/10 for the complexity.

There is a Mordheim-like campaign system. So that could be fun. I'm going to get the printed rule book.

I like this better than Gruntz."

Of course, YMMV but this came together nicely. There are a few things that could be a splash more crunchy, but then it would lose a bit of its ease of play. Indirect fire, for example, had no scatter, but we realized that this would require a template, which the author stayed away from. The combat is pretty streamlined.

Next time we play, we hope to do two things to make referencing easier in-game. First, combat cards for each unit, instead of a roster. Similar to Malifaux or other similar games, we'll need to design these, but that shouldn't be hard.

Second, we think a chit or token with the unit's Morale stat on it would be a huge help, especially if it could be written on with a wet erase or grease pen. The chit would follow the unit around the board, in a similar vein to Dirtside tokens. For the purist, it might clutter up the board, but we were already using blast markers. That, combined with a small card, would make pulling up numbers in-game that much more quick.

Again, "factor factor factor" comes up a lot in the game, but the modifiers are so straight forward as to be quite simple.

This game is a winner. There are so many unit types premade that exploring them all will be part of the fun. Not being greedy and sinking all my points into smaller, elite units will be hard to resist, but this game values concentrated fire, and all units seem to have a purpose. 

Pan African Union Troops

New Ground Zero Games Sculpts

By Eli 


First off, let me apologize to our readers and to Jon at GZG for the tardiness of this review. Jon was kind enough to send me a package of some of his new sculpts a bit back and I have been so tangled up with this and that preventing me from giving them a good review.

So, without further delay, let's get to it.

I received two packs of Pan African Union (PAU) troops, SG15-PA10 and SG15-PA12. 

PA10 is a pack of 8 (four different poses) riflemen armed with futuristic assault rifles. As with all of GZG's future fighters, these figures are tricked out in kit and sculpted in realistic combat poses with incredible detail. I am particularly fond of the helmets on these guys (PA11 is the same figures with hats) and feel they are the sort of headgear that places these figures in both realistic, near future settings as well as farther future settings like Traveller and other Space Opera types. These troopers are depicted with shirt sleeves rolled up as is fitting their tropical origins.


PA12 is a set of  light machinegunners. Eight (8) figures, again in four poses gives plenty of variety for most forces. Kneeling, advancing, and even prone gunners are all included and are depicted, again, in realistic poses without a lot of unnecessary drama. Unlike PA10, there doesn't seem to be a hats versions yet (?), but I imagine if you re packing a SAW you might feel better with a hardtop.


Personally, I plan to use these figures, combined with the Colonial Defense Force (I'll review these soon) figures as a mercenary unit. While not identical, they are close enough in tech and styling that I feel they would produce an appropriate mixed unit sort of feel that you might expect from a bunch of hired contractors. For those with a Star Wars mission in mind, these would make excellent rebel troopers.

Take care,

-Eli

Wednesday, 29 January 2014

Fireteam Andromeda Review by Podsy McPod

Posted by Harold
Written by Podsy McPod

Fireteam Andromeda
Fireteam Andromeda is available here: Wargame Vault for $16.43


Something old, something new, something borrowed, something blue...

Add up to a rather good set of sci-fi rules apparently.  Let me explain.  I was attracted to this rules system by the advertising blurb which promised that it would "easily handle 50 infantry models and 15 vehicle models a side in a two hour time frame".  I thought this to be an entirely outlandish claim but in fact it is a very fast system and although I am not there yet I can see myself having games of this size in around this period of time.


Monday, 13 January 2014

Fireteam Andromeda Review by Jan Juklíček


By Jan Juklíček
From: BATTLEFIELD PILSEN

Note from Harold:  I have been reading through this ruleset and have been preparing this review when I saw this review posted online.  I thought it was really good and got permission to repost here.

Fireteam Andromeda is $16.48 and available from Wargame Vault
(Two Knights Publishing)

Fireteam Andromeda Review


Fireteam Andromeda
This review is done from playtest version of rules however I assume not much has changed in final product as game seems very solid, from my point of view the author was inspired many game systems but it working well together.

So what is FT:Andromeda about? It is classic Reinforced platoon skirmish game as well as Gruntz, Tommorow war or Fast and Dirty. But this one is different in many ways.
Unlike most of the gaming systems for 15mm it use only one type of dice – old revered D6 and didn’t use much counters/markers.

Thursday, 19 December 2013

Mad Mecha Guy Containers

By Paul
From Mini Metal Mahem


 A few photographs of some of my laser cut MDF crates from Mad Mecha Guy.  These have been painted in the colours of the IMEC mining company who inhabit my fictional sci-fi universe.  I've used a Wilko red emulsion tester (I think it was "flame"!) and drybrushed with desert sand for a slightly dusty, used finish.  These will come in handy for decorating the starport or an industrial site.

Ready to load the truck

An assortment of crate - 3, 6, and 9cm lengths

 
15mm figures for scale.


The tops of some have been left open

Old toy lorry gets repaint in IMEC colors


IMEC logo stenciled on

Wednesday, 18 December 2013

Learning Experiences - Electrical Box Terrain

By Raymond Ford

From Over The Hill Gaming


Editor's Note: You may be wondering, "Eli, why another electrical box terrain piece?" I found this two-part piece to be a very well through out, yet brief look at a hobbyist's first experiences with electrical box terrain. He points out some things some of us might not consider and I know I learned a thing or two.


PART ONE
This is project that got started after doing a little reading on the Internet. The idea is simple – take a blue plastic box normally used for electrical work and modify it to look like a futuristic building suitable for a smaller scale sci-fi game.This article on the Reaper Miniatures site and this post on TMP do a good job of presenting the concept. The boxes and bits were inexpensive and everything looked like it would be within my skill level.

But, as they say, experience is the best teacher.

The first step was getting all the materials. A quick trip to the local Home Depot and a few dollars made me the owner of a couple of promising looking electrical boxes. A few minutes of sorting through my bits boxes yielded enough plastic doodads to provide some additional details like doors. I already had plenty of paints.

There were a few things on the electrical boxes that needed to be removed. Basically, anything that made them look more like electrical boxes and less like buildings. A few minutes work with my trusty Dremel took care of that.

Next was assembly. I washed everything in soap and water and let it all dry completely. Then I sat down to work.

First Point of Failure – Plastic Cement. I decided to use plastic cement since I was assembling plastic bits on plastic bodies. The only exception was a metal bit that I used super glue on. This proved critical awhile later.

After everything was put together, I let everything sit until the next day.

Since I had two electrical boxes, I decided to try two different approaches to painting and see which worked best. The smaller box got sprayed with some Krylon Fusion left over from a home improvement project from last year. The bigger box got hit with some craft store primer left over from one of my wife's projects, also from last year.

Second Point of Failure (Smaller Box) – Spraying on a base coat without primer. I noticed I wasn't getting good coverage on the smaller box. The original colors of the plastic box and bits were showing through the light gray of the spray paint. I applied more paint to correct for this, ultimately spraying down two fairly thick layers. This turned out to be a mistake. The second layer never really set correctly – it was still tacky to the touch after a couple of days. The age of the paint may have also been a factor.

Second Point of Failure (Larger Box) – Cheap primer. I had a much easier time spraying down the primer on the larger box, although multiple thin coats were needed for good coverage. The primer set overnight and was ready for painting. Unfortunately, it didn't do a good job of holding on to the paint. I have some experience with painting large, flat surfaces on miniatures – shields and larger pieces like Warjacks – so I knew the need to thin down the paints and go for multiple thin layers. But the paint refused to flow properly on the surface of the primer. It either pooled or ran down the sides. In any case, the results were unpleasant.

At this point, I had two unusable terrain pieces – one with paint that wouldn't set, the other with paint too ugly to put on the table. Hoping that everything would look better in the morning, I gave up and went to bed.

The next morning revealed even more horror. At some point during the night, one of the boxes was knocked to the floor. (Ah, the joys of letting my wife keep cats around.) As I leaned down to pick up the wayward terrain piece, I noticed that a few of the plastic bits had come off. A little experimenting revealed that the plastic cement had failed to provide a strong bond. I could break the plastic bits off the boxes with little effort. On the other hand, the metal bit I had super glued on refused to budge. These pieces wouldn't have lasted long if they had made it to the table.

Lessons Learned:
  • Both pieces have taken a long soak in a solution of Simple Green and water. The paint and primer came off after a good scrubbing. They need another wash in soap and water to get rid of any residue from the Simple Green, but are otherwise ready for assembly.
  • First Lesson Learned – Assembly. I will be using super glue to assemble everything with time around. The bond is much stronger than plastic cement on this material.
  • Second Lesson Learned – Priming. Both pieces will be primed a dark gray with an auto body primer. The dark color will cover up the original colors of the plastic better. I've also had good results with auto body primer providing a good surface for paints on large, flat surfaces. Multiple layers of thinly applied primer will be used to provide good coverage.
  • Third Lesson Learned – Painting. I'll try a slightly thicker paint mix when I get started. The paint mix I used before didn't seem too thin, but it's best to be sure. It's easier to thin down a paint than thicken it back up, anyway.

PART TWO
This is a fresh start incorporating the lessons learned from my previous attempt.


First Lesson Learned – I used super glue to reassemble the piece this time. Some tugging and a short drop served to test the bonds after the glue set. It should stand up to normal use - place it on the table, remove it from the table, put it in a box, maybe drop it on the way a couple of times - just fine.

Second Lesson Learned – I got out the auto body primer and started spraying. Sandable auto body primer is good stuff - it leaves a surface that holds on well to paint and bonds to plastic, metal, and resin. It took two thin layers to get a good, even coat that covered up the original colors of the plastic.

Third Lesson Learned – A darker color for better coverage seemed like a good idea. I also went back to the tried and true method of paint large, flat surfaces - multiple layers of thinned down paint. The paint dried smoothly.


The end result wasn't bad, but it looked dull and flat. Applying a thinned down dark wash brought out the details, but the piece was still missing something. I highlighted the corners and top with the original base color. Finally, I applied a thinned down brown wash to weather the piece. Small steps like these add character to a piece, but I might have gone overboard with the brown wash.


There is another, larger piece in the wings. I plan on adopting the same techniques to complete it later. For now, I've got some other projects to complete first.

Friday, 27 September 2013

REVIEW: Top Gun Armor - Light Grav Tank and Grav IFV

By Harold

To order or request an email catalog, e-mail Rob at: topgungrav@yahoo.com

There is a sale going on now until Oct 10:  http://theminiaturespage.com/boards/msg.mv?id=283386

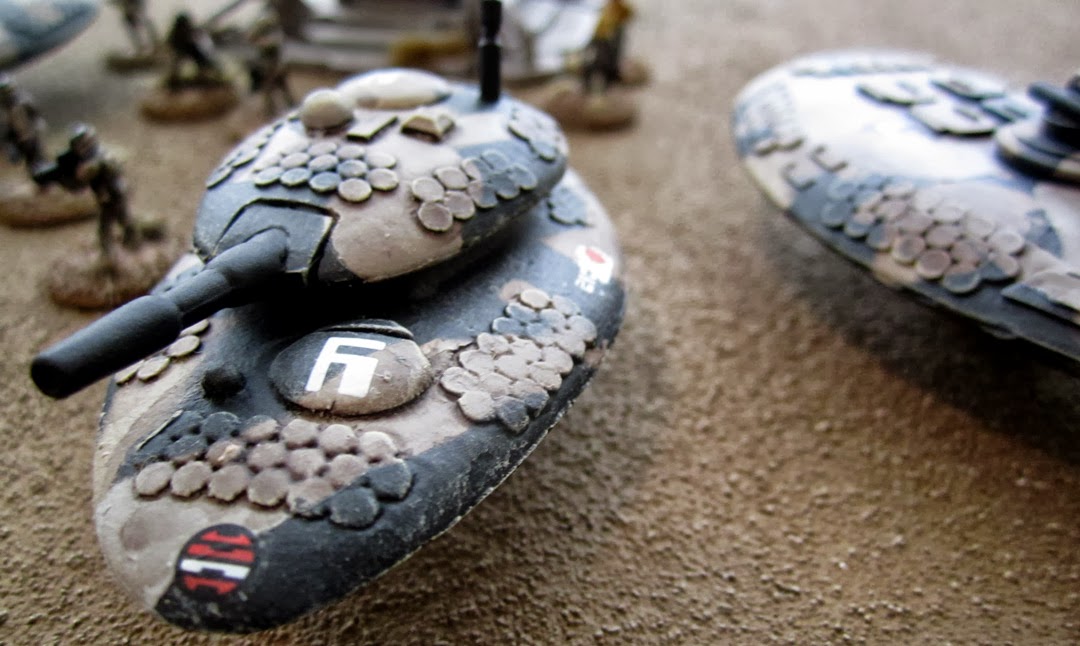
I have wanted to order some Top Gun Grav tanks for a while and I finally got around to it the other day. I ordered 2x Type 22 Grav Infantry Fighting Vehicle with AADS and 1x Type 9 Light Grav Tank with AADS.


 Type 9 Light Grav Tank
These are very nice kits.  Well cast, and nice crisp edges. They come with resin hulls and metal parts. The tank has the hull, turret, barrel and antenna.  The IFVs have door panels and a 3-piece turret.  Also included were some extra pieces I didn't use (maybe different antennas?) and some rare earth magnets.  It was great to get the magnets since these turrets would work well magnetized, you would just have to drill some holes.

Two Type-22 Grav IFV and one Type 9 Light Grav Tank
I ordered mine with the "active armor bumps" AADS, although they come in smooth varieties too.

Type-22 Grav IFV and one Type 9 Light Grav Tank (left)

For these pictures I placed the tanks on dice to lift them up a bit.  I haven't quite decided what I am going to do for the bases.  Probably a washer with a thin sturdy wire to hold them up.

The recon patrol secure a comm relay while technicians look on.
Comm tower from Warmill, figures from Ground Zero Games
I really like the look of these vehicles and they match the infantry I have very well.  I would imagine with the IFVs the troops would be in a fairly reclined position, and that it would easily hold 6 troops.  I don't see that as too out there, since reducing the cross section size on a grav tank would be top priority.  They match well with other vehicles I have, such as vehicles from GZG and Khurasan Miniatures.

The recon patrol secure a comm relay while technicians look on.
Comm tower from Warmill, figures from Ground Zero Games

I really like these tanks, I'll have to order more soon.  Top Gun has tons of different options and they are having a sale going on right now!

I rate these vehicles a:
6 reclined grav IFV riders out of 6!

Wednesday, 18 September 2013

Ion Age Desteria Demi Alpha - Released and Reviewed

by Chris

Here's a look at The Ion Age's latest release - the Desteria Demi Alpha.


The Desteria Knights are the heaviest power-armored troopers in the Prydian Army. The Demi Alpha pack includes five unique poses - armed with Impact Fists and a mix of double-bore shotguns, laser rifles, and plasma guns. They dwarf just about every infantry figure you might find on the 15mm battlefield... they are much larger than even the Retained Knight figures:

Monday, 15 July 2013

Tomorrow's War "By Dagger & Talon" Review

By Harold

Available here: http://ambushalleygames.com/products/store/product/show/cid-101/name-by-dagger-or-talon-preorder-a-pdf/category_pathway-0  $30.00

Ever since I've first heard of the supplement to Tomorrow's War by Ambush Alley Games called "By Dagger & Talon" I've been looking forward to it.   While the main Tomorrow's War rulebook did an excellent job in capturing the idea of what future sci-fi warfare would be, it didn't have the space to expound on some of my favorite sci-fi elements: aliens and special forces.

The cover, the figures are available from GZG, and the buildings from GameCraft Miniatures

"By Dagger & Talon" became available for pre-orders last week, and had a great deal that if you pre-order the print book, you get the PDF immediately and for free!

Well, of course as soon as I saw that I had to pick it up.


Thursday, 25 April 2013

My First Order from Mad Mecha Guy

By Chris

I would like to share the best-kept secret in 15mm terrain - Mad Mecha Guy. Here is what $55 worth of terrain looks like on a 2' x 2' table:


Not a bad way to fill a table! Everything is thoughtfully designed (he simply refuses to waste material when cutting his sheets!) and features nice detailing. The cuts are nice and clean - most pieces just needed a few seconds with a sanding sponge before they were ready to glue. My initial order from him was for these five packs:

Here's a quick look at each pack...

Monday, 1 April 2013

Review - Darkest Star Minis Spec-Sec Drive Armors

By Eli


Darby over at Darkest Star Games sent over some samples of his new Spec-Sec line of minis. Many of you may already be familiar with the Colony 15 stuff that has been shown here but the Spec-Sec is a range of minis along an entirely different path.

Darkest Star's Spec-Sec range is modeled after the cyberpunk style Japanese animation and comics style that you find in titles such as Ghost in The Shell, Appleseed, Bubblegum Crisis, and many others where smaller robots and mecha vehicles work along with police against hi-tech criminals, terrorists, and other hostiles.

While Darby sent over everything that's been released for Spec-Sec, I thought I'd start by reviewing the Drive Armors which are my favorite parts of the range. The Drive Armors are based after the multi-legged, "spider walkers" from Ghost in the Shell but while they are inspired by those machines, they are not copies and present new designs that evoke those classic machines. The Drive Armors come in three variations and sizes (from smallest to biggest) - Vantage, Mastiff, and Scorpios.


VANTAGE
The Vantage is a small, police/security unit and it looks perfect for its role. From the narrow body (good for alleys and urban sprawl) to the light bar on top of the body it looks every bit the law enforcement rig. Weapons on the model are rather subtle and include a pair of light MGs in the arms inside the claws and a pair of riot grenade launchers.

MASTIFF
This is the main Drive Armor of the Spec-Sec and used for their paramilitary operations against terrorists and military threats. Optimized for all-terrain it uses a variety of modular weapon pods, a chin-mounted gun, and claw-mounted guns.

SCORPIOS
In Darby's universe the Scorpios is a walking tank. Armed with anti-personnel, and anti-armor weapons it's high mobility legs allow it to traverse a wide variety of terrain. It comes with missiles, a cannon, arm guns and  a few features that could be interpreted as grenade launchers.

PARTS AND ASSEMBLY
These models were incredibly clean and the parts had minimal if any flash on them. All the legs and weapons are on sprues and clip cleanly from them with no difficulty. Each part is set up with a socket and and either a ball or peg so that you can anchor them nicely. The legs are one piece but their ball joint attachment allows you to position them low or high (my Scoprios is mounted high). Both the Scorpios and the Mastiff come with weapon options which are also interchangeable between them.

The only sticky part of the designs is their legs. While they are wonderful in their flexibility, it did take some fiddling before i mastered the curve on how to get them to stay. Again, this is a very minor issue and once i got the hang of it it went smoothly. My second Mastiff went together in a third the time of my first.

Not only are these models clean and neat and well-designed, but I also found myself conjuring up conversion ideas for them quite easily enough, making them even more versatile beyond their original forms. They stack up nicely against other forms of armor and walkers out there.

Scorpios with two Dream Pod 9 Walkers.

Some great painted Drive Armors can be found in the Darkest Star gallery (bottom of the page). These were painted by fellow blogger Mark Kinsey from Daddy's Little Men.

Thanks for reading,

-Eli